You’ve just unboxed your new WiFi thermostat, and you’re ready to start the installation process. There’s just one problem: your system doesn’t have a C wire. What do you do?
First, it’s important to make sure that you really don’t have a C wire (more on that shortly). It’s also important to understand what a C wire is, so you know why it’s necessary to have one.

What is a “C” Wire?
Today, many thermostats come with Wi-Fi capabilities. This means the thermostat is able to connect to your Wi-Fi so you can manage the temperature through an app on your smartphone or tablet. One of the most difficult tasks when setting up these thermostats is setting up the Wi-Fi. However, it is not impossible!
First, let’s understand what a c wire actually means…
A “C” wire is also referred to as a common wire. The common wire is the low-voltage power wire that WiFi thermostats require in order for their advanced features to work. Unfortunately, many older homes do not have a C wire installed because old thermostat model simply didn’t require one.
You see, old model thermostats were simple devices. They didn’t need a continuous power supply. But new thermostat models often have backlit displays and WiFi connectivity, which requires a steady stream of power.
Chances are, you will not have a C-wire, which is an AC common wire. This is because many homes still have older thermostats that were not made to have Wi-Fi capabilities, therefore they did not require the installation of a C-wire.
Today’s new thermostats have backlights, geolocation abilities, and Wi-Fi, and in order to have these qualities, you need a C-wire. Also, many buyers wonder if they can simply install their WiFi thermostat without C wire and still use its advanced features. You can’t – unfortunately,
How to Check for a “C” Wire
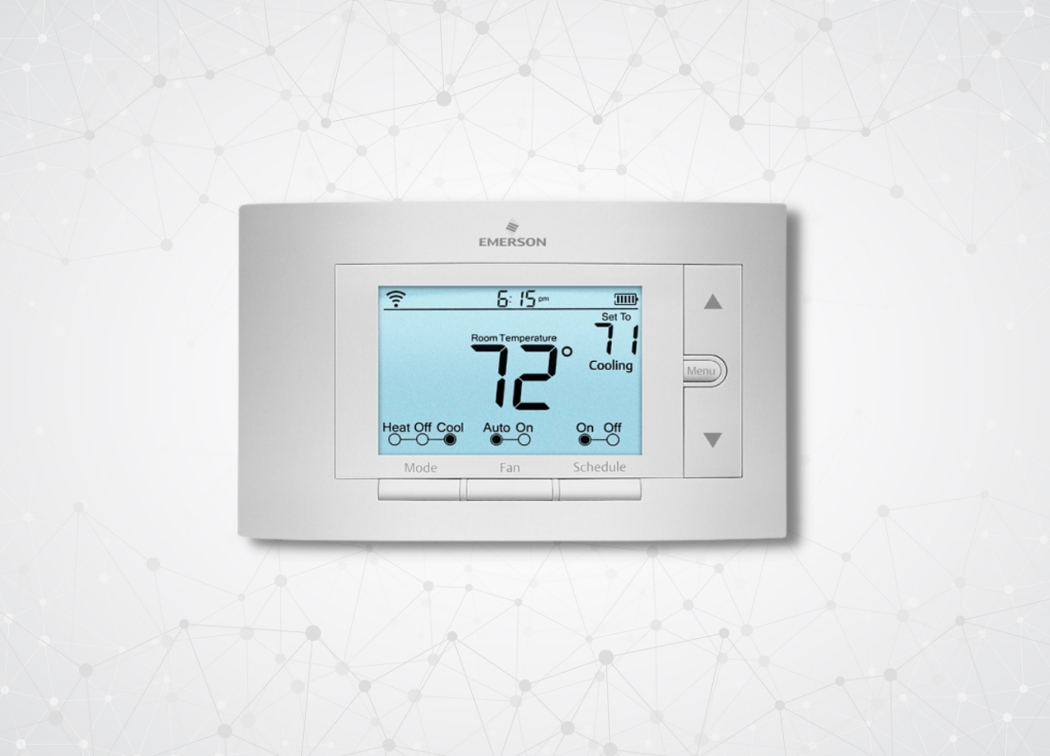
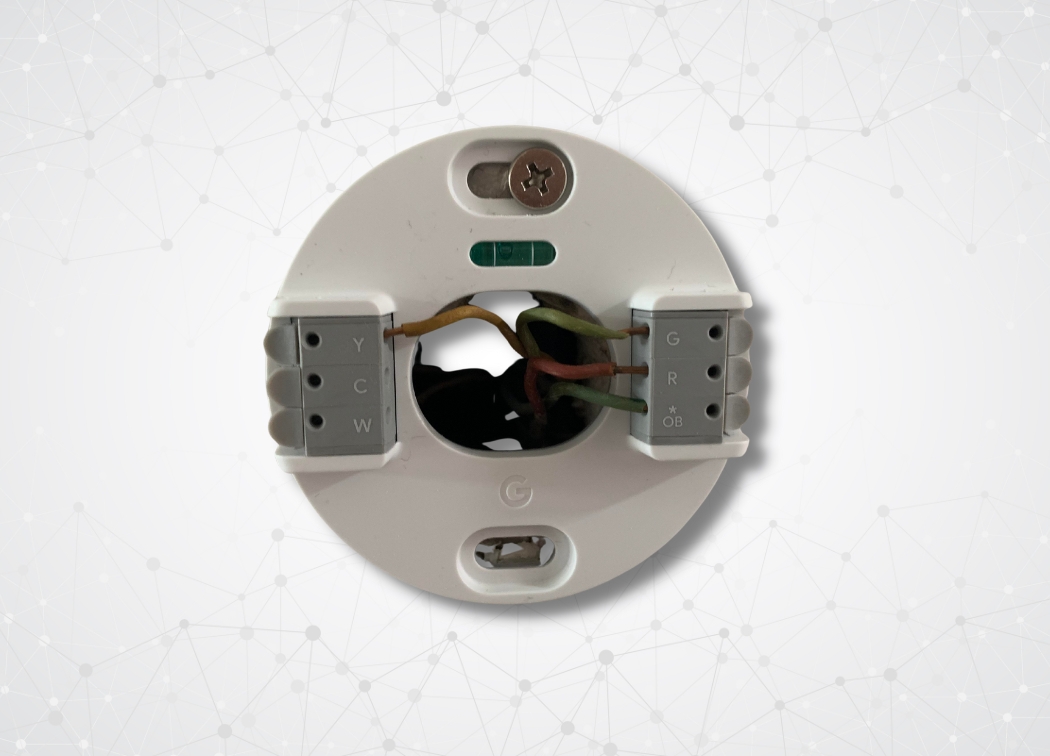
The simplest and easiest way to check for a common wire is to look at your thermostat. Detach the thermostat from the wall, and take a look at the wires that are connecting to it.
There should be a terminal labeled “C.” If a wire is connected to this terminal, you’re good to go. You can just install your new thermostat as normal.
If you don’t see a wire connected to the “C” terminal, don’t panic – you may still have one. Sometimes, the common wire is hidden in the wall behind the thermostat.
To find out if you have a hidden “C” wire, check your furnace. If you find a common wire here, there’s a good chance that it’s just hiding in the wall.
How to Install a WiFi thermostat without C wire
If you don’t have a common wire and want to install a smart thermostat, you still have quite a few options.
Option 1 is to buy a smart thermostat that doesn’t require a C wire. The Sensi and Ecobee are two top models that don’t require a common wire.
Option 2 is to follow the step by step process given below.
Step 1
First, assess what you have in the box containing your new thermostat and set-up kit. This is an accurate replication of what you should have in your box.
Step 2
Power off the heating, ventilation and air conditioner system before starting with your installation. Do this by turning off the master switch on your circuit box. This box is usually found in your basement, attic, closet, or garage.
Step 3
Ensure your system is shut off by turning on your air and feeling your vents for any air movement. You should not feel anything.
Step 4
Remove the old thermostat cover from the wall. You shouldn’t need any tools for this. It should just need to be popped off or unclipped from the base.
Warning: If your thermostat’s back plate has a lot of indicators that say L1 L2, warning high voltage, or 110 VAC, 120 VAC or 240 VAC, then sadly you will not be compatible for this.
Step 5
Quickly, snap a picture of the wires that are located on the back of your old thermostat. You will need this for future reference.
Step 6
Since we already established you do not have a C-wire, you will need to use the Power Extender Kit (the PEK) . Here is the one recommend from Ecobee.
The PEK requires certain wires for your system in order to work:
- 4 Wires: y/y1, R, G, W/w1
- 3 Wires: R, y/y1, and G
Step 7
Take the power extender kit, tools, your smartphone, and wire labels, and take them over to your HVAC system (often found in your basement or attic).
Step 8
Open the HVAC cover to its control board and take a picture of the wires that are connected to the control board. You might need these for reference.
Step 9
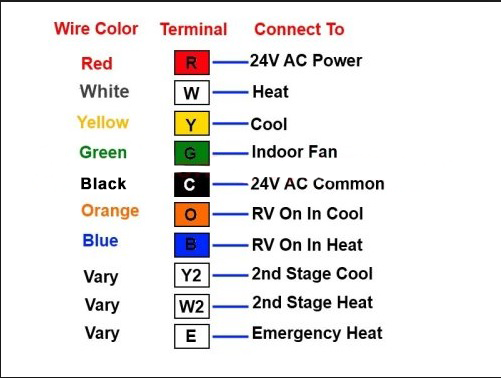
Label the R, Y, G and W wires for assistance. Next, disconnect the R, Y, G and W wires from the control board, and re-connect them to the matching grey terminal blocks located on the Power Extender Kit.

Step 10
Now, connect the five white wires that are coming out of the PEK to the terminals on its corresponding control board. This is how it should look:
Step 11
Once you are finished, mount your PEK inside the HVAC system. Close your HVAC panel securely, and head back to your NEW thermostat.
Step 12
Now that you are back at the thermostat, disconnect and label the wires from the old thermostat using your label that was provided. Then remove your old thermostat cover.
Step 13
Pull the wires through the hole located in the middle of the backplate. Next, attach the wires to the wall. You want to connect in this order:
R/Rc/Rh Rc, G/C, Y PEK
Step 14
Press the thermostat back into its back plate and click it shut. Then turn your HVAC system back on!
Important Things to Consider During the Installation
First and foremost, make sure you have the right tools! Below is a tool checklist to help ensure you are prepared before you start:
- Drill
- Small flathead screwdriver
- Phillips screwdriver
- Hammer
- Pencil
- Wire stripper
Second, you need to make sure you use your labels. Most people throw them out or forget about them, but they will make the process so much easier. Skip the guessing game and make the process move quicker by knowing your wires.
Lastly, double check your package and make sure you have everything you need. Use this check list to ensure you have everything before you start:
- New thermostat
- Backplate
- Power extender kit
- Trim plate
- Install guide
- Drywall plugs
Third Option:
Run a “C” wire from your furnace to your thermostat. Now, you can hire a pro to do this (which is what we recommend), or you can do it yourself.
How to Add A C-Wire to Furnace
The number one thing to keep in mind is to make sure your breaker for the furnace is off before you begin with installation!
To connect a C-wire to your furnace, you first need to make sure that your furnace comes equipped with a C terminal. If your furnace does not have a C terminal, you can add a 24V transformer to the furnace, which will make the furnace compatible with a C-wire connection.
To add a C-wire to your furnace, follow these steps:
- Turn off the breaker for the furnace.
- Remove the access panel and locate the wires that connect to the thermostat.
- Disconnect the thermostat wire from the G terminal. Connect the C-wire to the C terminal.
- Note: If you have both central heat and air, then you’ll need to make a jumper using an 18 AWG wire. Take the wire and connect the Y and G terminals.
- Put the cover back on for the access panel.
- Now go back to your thermostat and disconnect the G terminal wire.
- Connect the wire from the G terminal to the C terminal.
- You can now switch the breaker for the furnace to the on position.
Where to Connect a C -Wire on the Furnace
To connect your furnace to the C-wire for your new thermostat, simply run the C-wire from the thermostat and connect it to either the C terminal of your furnace or the transformer (if your furnace does not have a C terminal already).
If you’ve never done anything like this before, it’s best to leave this job to the pros. But if you’re comfortable with this type of job, you can but a spool of color-coded thermostat wire and go to town.
A Forth option: would be to buy an adapter, like the Venstar Add-A-Wire that adds a fifth wire to your four-wire setup.
This DIY-friendly alternative and inexpensive option will bring you the Wi-Fi capabilities to your new thermostat. What is in the box?
- Venstar Add-a-Wire device
- Additional wires
- Installation manual
- Electrical caps
The tools you will need:
- Phillips screwdrivers
- Electrical tape
- Needle nose pliers
- Drill/drill bit
- 2 wire nuts (included)
The Venstar Add-a-Wire adapter is much cheaper and much easier than running completely new HVAC wiring. If you don’t have the time, money or experience to re-wire your system yourself, we highly recommend this to those with no C-wires.
If you think you have understood the whole process and are ready to pick the best wifi thermostats that require a c wire. Then check out our top picks for 2017 below.
Remember, unless your smart thermostat specifically states otherwise, you will need a “C” wire to install your new unit.
That’s why we highly recommend checking to see if you have a common wire before you buy your thermostat, so you can decide whether you want to put the time and effort into running the wire, or simply buy a WiFi thermostat without C wire requirements.