If you’re trying to squeeze every ounce of power out of your gaming rig, then you’ve probably dabbled in overclocking. When you overclock a GPU or overclock a CPU, you’re forcing the hardware past its usual limits and producing more power, but there’s one more thing that you can push further: your monitor.
Gamers usually opt for monitors with higher refresh rates because they make for smoother gameplay, as each frame has less time before being replaced. Unfortunately, 120Hz and 240Hz displays can get pricey but monitor overclocking gives you a way of artificially boosting your refresh rate.
Read also: Best monitor size for gaming
A typical monitor will feature a 60Hz refresh rate, but through overclocking, you can often push one up to 80Hz, making for smoother gameplay. This guide is going to cover everything you need to know about how to overclock a monitor.
How to Overclock a Monitor
The first thing that you’re going to need to do is to go over all of the documentation that came included with your monitor to ensure that what you’re doing is safe. Monitors will perform differently while being overclocked based on their designs, and some of them may not work at all, and they may even damage themselves.
The best way to overclock your monitor is by using the CRU, which stands for Custom Resolution Utility. This program lets you do a lot more than just switch your refresh rate, so if you know your display settings, feel free to tweak things to your liking, but otherwise, you’ll want to stick to the refresh rate.
Custom Resolution Utility
This program was created by ToastyX, and it’s by far the most popular way to overclock your monitor. If you don’t see any higher settings for the refresh rate, then it’s likely that your display doesn’t support it in the first place, since the CRU has a surprising degree of compatibility.
New users will have relatively easy instructions to follow within the program when adjusting refresh rates, but other functions are going to take some learning. Thankfully, the CRU forums are filled with fellow users who are willing to help out, and even ToastyX can be found there.
Extra Options with Nvidia GPUs
If you have an Nvidia graphics card, you have a few extra options when it comes to adjusting your monitor’s refresh rate (and, of course, overclocking it). The simplest method works on Nvidia cards made by EVGA, and it’s as simple as using the refresh rate slider in the Precision X16 Utility.
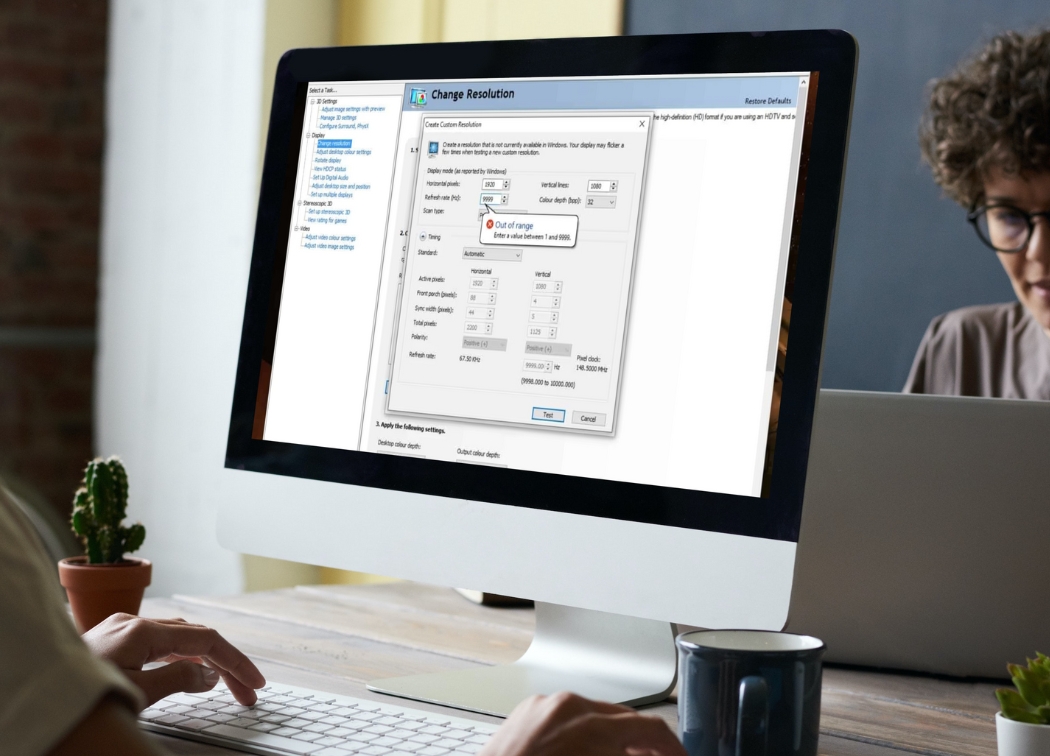
If you have an Nvidia card that’s made by another company, then you can instead use the GeForce driver. You’ll want to go to the Nvidia control panel, pick Display, and then go to Change Resolution. Under Change Resolution, click Customize and then Create Custom Resolutions. This will let you create a resolution with the refresh rate that you desire.
Another thing to consider is the display cable that you’re using, as HDMI will usually lack the bandwidth for higher refresh rates. You’ll want to stick to using a DVI or DisplayPort connectors. If you’re stuck with HDMI or a single-link DVI, then you’ll need to download a Pixel Clock Patch utility for CRU.
Picking the Right Refresh Rate
When you’re finally in the right menu to adjust your refresh rate, then you’re probably wondering how to choose the right one. The short answer is that you use trial and error, but there are a few ways that you can get started on the right foot when choosing your overclocked refresh rate.
Related: what cables support 144hz refresh rate?
At first, you’ll want to turn up the refresh rate as high as you can until you start seeing sync errors on your monitor, and that will help you identify your absolute limit. Keep in mind that anything below this won’t automatically be perfect, as you may still have to deal with tearing and other problems.

The best way to test your refresh rate is to play a game, as that will give you an idea of how responsive the controls are. First person games will usually give you the best gauge of responsiveness, as you’ll be able to see the delay more directly. If the refresh rate feels worse than before, dial it down a bit more.
Keep turning back the refresh rate until you find something that feels more comfortable than the basic 60Hz. This may take you some time, so it’s smart to pick a game that you can load in and out of without too much trouble. Soon enough, you’ll have a refresh rate that feels comfortable.
You can also use this helpful tool from Blur Busters to ensure the validity of your overclock.
Potential Issues When Overclocking
Of course, when exceeding a display’s limitations, you may end up running into problems, and there is a range of potential issues when overclocking. The most common problem is the appearance of artifacts on the display. You may also have to deal with excessive screen tearing when overclocking a monitor.
In the worst cases, the monitor may shut off entirely, though we’ve never heard of anyone permanently killing their display through overclocking, though it may be possible. As with other forms overclocking, you’ll want to be careful with any piece of hardware that you can’t afford to lose.
Conclusion
We hope that this guide has managed to condense all of the relevant info that you need to overclock your monitor. Be sure to take care when overclocking any piece of equipment, as you’ll be almost certain to void the warranty, and damage is always a possibility.
Read also:
What is monitor response time?