Lens hoods are an accessory that is often overlooked but can be really helpful. Its main purpose is to block unwanted light from striking the lens of the camera.
Direct light can cause lens flares and spotting and reducing contrast. It can also highlight any dust the happens to be on the lens. Indirectly a lens hood can help reduce reflected light from nearby objects.
I’ve had more than a few people look at me strangely because of the hood attached to my lens. They view the lens as some exotic piece of gear. This just tells me that most people don’t know what it is and what its for. It also tells me people don’t see them nearly as often as they should.
It is a shield from sunlight
Pictures taken with a lens hood on may have deeper richer color and slightly better contrast between light and dark areas. Think about standing out in the sun without a hat verses with one.
The hat’s brim can help block angular light and make it easier to see. This is why sports like baseball or golf always feature a hat. They serve the same purpose as the lens hood.
You should use a lens hood if you are shooting longer exposures. This is due to the shutter being open for so long there is much higher risk of undesirable light interfering with the proper exposure.
A hood is a protection for the lens
Good lenses are not cheap, and they deserve all the protection we can give them. Lens hoods offer some of that protection. I have had a lens hood keep one of my lenses from being scratched by sticking out in front of the lens and taking the brunt of a tripping tripod. I have also turned and scraped the hood on a tree. Both would have been much worse accidents if not for the hood.
There is nothing worse than getting an awesome shot and having it compromised by fingerprints or water drops on the lens. On some photos it might work out, for some it would not. Why take than chance.
Sure, lens hoods can be a extra expensive if your lens doesn’t come with them. But they are not that spendy and can be good insurance. A clean dry lens will allow the camera to get a better-quality image for you.
It doesn’t take up space in the bag
Lens hoods usually attach in the reverse position for compact convenient storage, just remember to flip them around when you are getting ready to do some shooting. The hood can also offer some convenience if you have a top loader style bag. You can simply leave the hood in place and leave the cap off for a quick and easy deployment when a photo moment comes along.
Also, please do not leave the lens hood attached in reverse position while taking photos. Its right there, turn it around and put it to good use protecting that lens!
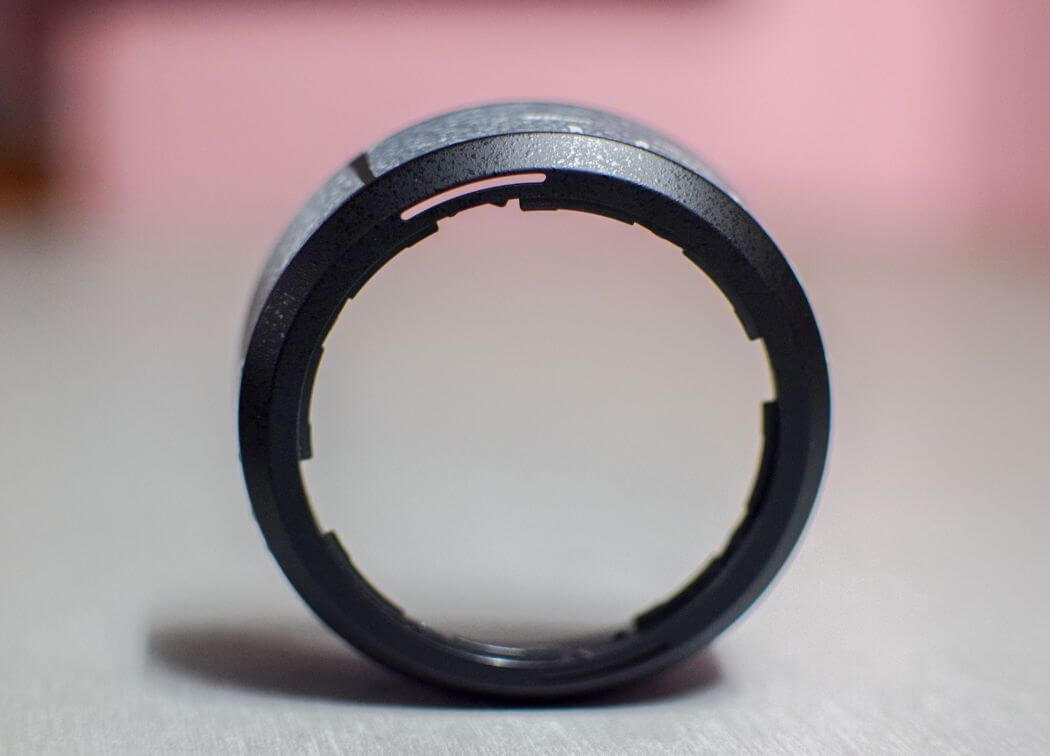
There are two types of hoods
The petal type hood is good for wide angle lenses with a shorted focal length. The hood is cut to offer maximum protection while still allowing for image clearance. Usually there are long petals and short petals. The longer petals go on the top and bottom, and the shorter ones on the sides. This is because most picture formats are much wider than they are tall.
The barrel type hood is good for lenses with a long focal length, such as a zoom lens or a long prime lens, such as a 135mm. Since they don’t need to provide for image clearance, there is no need for shaping. This offer total protection against sun strike or accidental damage.
The lens hood advantage of DSLR cameras
Small point and click cameras, fixed lens cameras without mounting threads and even smartphones do not have a way to attach a lens hood to protect the lens. Therefore, they can be more susceptible to light strike and flaring. This is one advantage Interchangeable lens DLSR cameras offer, amongst others.
There may be times when you don’t want to use a lens hood
1. If you can see the hood in the frame
It’s rare but possible for super wide-angle lenses, especially if using generic a 3rd party hood. If you have the lens zoomed all the way back and the hood is showing, then you may need to remove it. This is a trade-off between the wide-angle and light interference.
2. It may not be possible attach a lens hood
There may be times when you have attachments (filters for example) on your lens, which don’t lend themselves well to using a lens hood.
For example, I have a lens that has a somewhat deep cylindrical hood and it’s difficult to use with a circular polarizer because you cannot reach in and turn the adjustment ring. In this case by all means go without the hood.
3. You actually want a flare in your photo
Flares can add some excitement to your images. This an effect that is often desired and is a feature of most popular image editing software. If this is an effect you want, then by all means remove that hood!
4. The lens hood is creating vibration
Lens hoods tend to have a lot of surface area so it’s possible for your lens hood to catch the wind and cause the camera to shake, resulting in blurry images.
Probably more likely when tripod mounted. If it’s fairly windy and the hood isn’t strictly necessary (there is not direct light issue) you should remove it.
5. The lens hood is casting an unwanted shadow
There is the possibility that the lens hood will cast a shadow on your subject. In this case, just remove the hood. There may also be a shadow if you have backlight that is at a perfect angle to the camera. You can either change positions or remove the hood.
Conclusion
And if you don’t have one, maybe consider getting one. They are not expensive at all. Is using a lens hood a requirement for good photography? heavens no.
I have shot lots of perfectly good pictures without a hood on. There are plenty of reasons to use them, especially if they came with your lens in the first place.
Personally, I mostly do landscape photos, where the sun is nearly always a factor. But anyone that shoots outdoors can benefit. I say if you have them, use them and if you don’t, consider a modest investment. Happy shooting.