Photography is one of the most favorite hobbies of millions of people in the world. Through photography, you can take photos of your daily experience and have a collection of memorable moments. Furthermore, photography can help you to relax and take a break from your stressful world. With photography, you can capture the beautiful and thrilling moments in your travel and other outdoor adventure. However, to make the best of your photography passion, it is essential to have the best and quality equipment. With the best photography equipment, you can shoot in the best possible manner. Even more important, you can also enhance your skills in photography and videography.
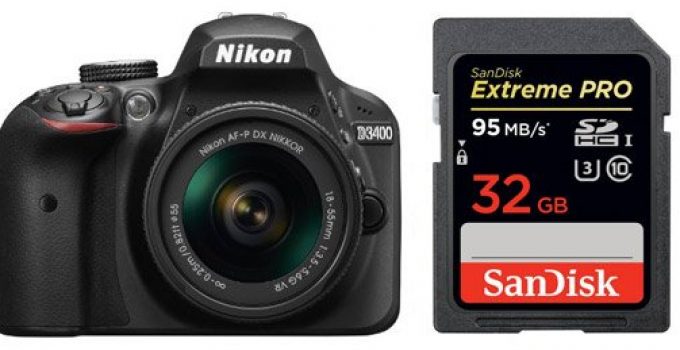
If you love photography, you must have a quality camera that can serve as your best companion for your daily activities. If you are looking for an excellent performing camera, you can opt for the Nikon D3400. It is among the most popular brands of DSLR cameras in today’s modern generation. This camera comes with great specs, features as well as shooting capabilities. The Nikon D3400 can offer you excellent performance for your photography and videography needs. Meanwhile, aside from a quality camera like the Nikon D3400, you also need a quality memory card for storage.
With lots of brands in the market, it can be hard for you to choose the best Nikon d3400 memory card. Don’t worry because we will guide you regarding this matter. Having a quality memory card for your camera is essential for its best efficiency. Thus, a memory card can help you to store videos and pictures of your daily lifestyle. There are plenty of options in the market, so you must choose according to your individual needs. If you love recording HD videos for your vlogging, you must prefer a fast memory card.
You must have a memory card that comes with better writing speed. With this, you can enjoy recording videos and capture images of your indoor and outdoor activities. If you are still confused about what memory card for Nikon d3400 is the best for you, continue reading because we will offer you a list of the top best memory card for Nikon d3400 that you can choose from. Whether you are a newbie or professional photographer or videographer, having a wrong memory card can affect the performance of your camera. Please check out our review about Nikon D2Xs review & Nikon Coolpix L340 Review
When it comes to choosing a memory card for your Nikon d3400, you must consider some factors to ensure that the money, time, and effort you invested for it are all worth it. Do you want to avail of the best Nikon d3400 memory card? Then, you come to the right place. We have reviewed 10 models that can help you achieve your goal. In this post, we have chosen the best memory card for Nikon d3400 in the market today. What’s more, we also provide you with a buyer’s guide and FAQ section to help you easily compare the top Nikon d3400 memory card.
But before we proceed, here is our best overall and best budget pick if you are in a hurry.
Best Nikon D3400 Memory Card: 30 Second Summary
- Best Overall: The SanDisk Extreme U3 UHS-I memory card can be your perfect partner to make the best performance of your Nikon D3400. It can give you faster write speeds. It has 256 GB that can enable you to store videos and photos. If you want to have faster best shot of your daily activities, this is the best option of a Nikon d3400 memory card type.
It is ideal for both novice aas well as professional photographers. It is also efficient for videographers because of its excellent video recording performance. It utilizes a UHS-I interface and comes with faster writing speed for your photography or videography needs. If you want to enhance your creativity for your photography passion, the SanDisk Extreme U3 UHS-I memory card is for you. - Best Budget Friendly: PNY Elite Performance 64GB memory card is the best option if you are a budget-conscious videographer or photographer. With its affordable price, you can expect to have a reliable memory card for Nikon d3400.
It is perfect for high-performance cameras like the Nikon d3400. It comes with fast speed performance that helps you to reduce the time on transferring videos and images on your computer. With its excellent storage capacity, you can enjoy unlimited picture taking and video recording which can give you a high level of happiness and satisfaction. With this memory card, you can get the best performance of your Nikon d3400 without breaking your budget. Also, read Nikon d5500 vs. Canon t6i.
Review of the Top 10 Best Nikon D3400 Memory Card
It is a fact that you can find a variety of memory cards for Nikon d3400 in the market. Moreover, these memory cards come with specific features, specifications, and pricing. With this, it is quite challenging for you to choose the right one for your needs. Fortunately, we have collected the best products to help you.
The following is our reliable and honest review of the best Nikon d3400 memory card.
1. SanDisk Extreme U3 UHS-I – Best Overall
Features:
- Video Speed Class 30 (V30) (2)
- UHS Speed Class 3 (U3)
- Built for extreme conditions
- Capture uninterrupted video
- Shot speeds about 70 MBs
This memory card can be your reliable companion in your outdoor adventure and travel activities. It features faster write speeds, which can help you to store more videos and photos. With its 256B storage capacity, you can enjoy your photography habit without interruptions. Its high performance allows you to take control of your creativity when it comes to photography and videography.
The SanDisk Extreme U3 UHS-I memory card is built with great quality, so you can expect its best performance for different shooting conditions.
The only negative thing about this Nikon d3400 memory card is that some customers complain that the card can be easily broken.
Pros:
- It can help you to capture the live action without skipping a beat
- It has transfer speeds up to 150 MBs, so you can get the best shot quickly
- It is ideal for shooting uninterrupted 4k UHD video
- This memory card comes with great durability
- It is shock-proof, waterproof, temperature-proof, and x-ray proof
- If you accidentally delete the images, you can recover it because of its RescuePRO Deluxe 2 Year data recovery software
- Spectacular sequential burst mode shots
Cons
- Some customers complain that the card can be easily broken
2. PNY Elite Performance 64GB – Best Budget Nikon D3400 Memory Card
Features:
- 95 MB/ sec speed for ultimate transfer for HD camcorders and DSLR cameras
- Class 10 UHS I, U3 performance for burst-mode shooting, 4K Ultra HD video recording, and full HD
- Durable and reliable memory card which is shockproof, magnet proof, waterproof and temperature proof
- Compatible with SDXC and SDHC devices
The PNY Elite Performance 64GB is the ideal memory card for those who are looking for affordable but quality Nikon d3400 memory card. It has 95 MB per sec speed, which is perfect for high-performance cameras and HD camcorders. It can be your companion on shooting ultra-fast action shots, HD video, sports video, as well as other types of photography. It features Class 10 UHS I, U3 performance for burst-mode shooting, 4K Ultra HD video recording, and full HD.
Apart from its affordable price, you can be satisfied with its excellent quality. It has fast speed performance for easy transfer of videos and photos to your computer.
One drawback of this memory card is its slow writing speed.
Pros:
- It is durable and reliable even in tough situations
- This memory card is magnet proof, temperature proof, shockproof and waterproof
- It features Class 10 UHS I, U3 performance for excellent photography and video recording
Cons
- One drawback that customers complain about this product is its slow writing speed
3. Transcend 64 GB High Speed 10 UHS-3 Flash Memory Card – Best for 4k Video Recording
Features:
- MLC flash-based reliability and performance
- Useful exFAT file system
- Exclusive RecoveRx photo recovery software
- Class 10 compliant – compatible with SD 3.01 standards
- Enhanced camera response for fast-action consecutive shooting
The Transcend 64 GB High Speed 10 UHS-3 memory card is for you if you love to record videos. It is perfect for Ultra 2160p HD, full 1080p, 3D, HDD, and 4K video recording. It can enhance the camera response for fast-action consecutive shooting. It can also support Content Protection for Recordable Media (CPRM). It features a great exFAT file system (SDXC).
This memory card for Nikon d3400 is compatible with SD 4.20 standard. It supports Ultra-High-Speed Class 3 specification (U3). It is also equipped with a built-in Error Correcting Code (ECC) for detecting and correcting transfer errors.
The only negative side of this product is that the card can be easily broken according to some customers.
Pros:
- It is perfect for 4K2k, 3D, and Full HD video recording
- Next-Generation UHS-I U3 Transfer Speeds
- Great device compatibility
- RecoveRx software for recovering accidentally erased files
- It is perfect for shooting stunning photos and still videos
Cons
- Some customers complain that the card can be easily broken
4. Kingston Digital SDXC Class 10 UHS-I – Best Memory Card for Cinema-Quality
Features:
- Advanced UHS-I interface for 3D photos and video, cinema-quality HD 1080p and other types of photography
- Delivers Class 10 performance for capturing still and beautiful photos and videos
- Built with excellent quality
- It can withstand temperature range from -25 °C to 85 °C
If you want a cinema-quality photos and videos, the Kingston Digital SDXC Class 10 UHS-I is the best option. It comes with an advanced UHS-I interface making it perfect for 3D video, full HD 1080p, and other types of photography. It can deliver you with Class 10 performance. If you want still and stunning photos and videos for your Nikon d3400, this memory card is for you.
This model is perfect for outdoor adventurers. Thus, this Nikon d3400 memory card type is useful even in tough shooting conditions. It is temperature proof, x-ray proof, vibration, and shockproof. With this, you can enjoy shooting and recording your memorable experience in your travel adventure.
Meanwhile, one drawback of this product is that some customers complain that it can’t last around 6 months.
Pros:
- The versatile memory card that is useful for vacation photos and HD videos
- It has great durability since it is temperature proof, X-ray proof, waterproof and shock and vibration proof
- It is guaranteed with a lifetime warranty
- Fast speeds for your photography and videography habits
Cons
- Some complain that the card can’t last for six months
5. Sony 64GB Class 10 UHS-I/ U3 SDXC – Durable Nikon D3400 Memory Card
Features:
- File Rescue Downloadable Software
- Supports 4K recording
- High-Speed Performance
- Fast transfer back to PC
- UHS-1 media for faster buffer recovery
If you love outdoor activities, the Sony 64GB Class 10 UHS-I memory card is for you. It comes with about 90 MB writing speed. This can be your best memory card for Nikon d3400 because of its amazing features. It comes with file rescue downloadable software that enables you to recover accidentally deleted videos and photos.
This memory card comes with trusted reliability for your satisfaction. It is useful even in complicated shooting conditions. It is dustproof, temperature proof and waterproof making it a great companion for your outdoor activities. It also comes with anti-static technology and UV guard.
However, some customers complain that it has a slow writing speed.
Pros:
- 95 MB transfer speed and 90 MB writing speed
- It has file rescue downloadable software that enables you to recover files that you accidentally deleted
- Reliable UHS-I memory card with data integrity
- Durable and waterproof making it perfect for different shooting conditions
- High-speed performance for your videography and photography needs
- Ideal for high-speed burst shooting and 4K video
Cons
- Some users complain about its slow writing speed
6. Lexar Professional 633X 256GB – Memory Card for Outdoor Adventurers
Features:
- High-speed file transfer from the card to computer
- Downloadable software for recovering accidentally deleted photos and videos
- Class 10 performance- leverage UHS-I technology
- Perfect for 4K video shooting
- Transfer speed of 95 MB
This Lexar memory card is for you if you wish to capture stunning photos and quality videos in your outdoor activities. You can expect the best performance of your Nikon d3400 using this memory card. It can capture 3D, 4k video, and 1080p full-HD video. It can also film extended lengths of a video with high-capacity options.
With its high-speed performance, you can accelerate your workflow for your photography and videography activity. It has a speed rate of Class 10 performance. It is powered by leverage UHS-I technology, which delivers transfer speed of 95 MB. It has huge capacity options up to 1TB, so you can enjoy unlimited shooting without changing your memory card.
The negative thing that we can say about the Lexar memory card is that it has a slow writing speed.
Pros:
- High-speed performance for accelerated workflow for your photography and videography passion
- Class 10 performance that delivers 95 MB transfer speed, so you can capture moments without missing a beat
- It can capture extended lengths of video using high-capacity options
Cons
- Some users complain about its slow writing speed
7. SanDisk Ultra SDXC UHS-I – Reliable Memory Card for Fast File Transfer
Features:
- Excellent video recording performance with Class 10 rating for 1080p videos
- Fast transfer speeds up to 80 MB
- Great durability
- Built-in write-protect switch
- Ideal for camcorders and point-and-shoot cameras
The SanDisk Ultra SDXC UHS-I is among the most trusted memory card for Nikon d3400. It is ideal for camcorders and digital cameras like Nikon d3400. With the use of this memory card, you can transfer files quickly and take pictures without skipping a beat.
He best about this product is that it can offer you great performance not just for shooting pictures but also for recording videos. You don’t have to worry because the SanDisk Ultra memory card is built with great quality to withstand touch shooting conditions. You may also like Best Memory Card for GoPro .
One drawback of this Nikon d3400 memory card is that it doesn’t come with a file recovery feature.
Pros:
- The ultra-fast speed that for smooth photography and videography
- Easy transfer on your device
- Durable design making it useful for extreme shooting environments
- Waterproof, X-ray proof, temperature proof, shockproof and magnet proof
- Class 10 performance that enables you to capture full HD video continuously
Cons
- It doesn’t have a file recovery feature
8. SanDisk Extreme PRO SDXC UHS-I – Best Nikon Memory Card for Professional Photographers
Features:
- Ideal for professional photographers
- Record 4K UHD video (3)
- Faster post-production workflow
- Read speeds of about 95 MB
- RescuePRO Deluxe data recovery download
The SanDisk Extreme PRO SDXC UHS-I is the best Nikon d3400 memory card for professional photographers. It comes with a reading speed of about 95 MB and writing speed of about 90 MB. It is also a durable memory card because it is useful even in extreme weather conditions. The best about this memory card is that it is waterproof, shockproof, temperature proof, and x-ray proof.
If you are a professional photographer who wants to maximize your post-production workflow, this product is for you. It comes with UHS speed Class 3 (U3) and UHS video speed Class 30 (V30) for 4k UHD video.
One downside of this memory card is that some customers complain that the card can be easily corrupted.
Pros:
- Excellent speed for reliability and performance
- 95 MB transfer speed for effective post-production workflow
- 90 MB writing speed for sequential burst mode, rapid shots as well as JPEG and RAW capture with ease
- It is made with great quality for maximum performance
Cons
- Some customers complain that the card can be easily corrupted
9. RETTRU HD SAUAMOZ Micro SD Card 32GB – High-Speed Nikon D3400 Memory Card
Features:
- High Compatibility with different devices
- Durable and reliable memory card
- Micros SD card up to 80 MB and 20 MB reading and writing speed
- Full HD video capture
The AUAMOZ Micro SD card 32 GB is a high-speed Nikon d3400 memory card that you can rely on for your photography and videography needs. It is a card with up to 80 MB and 20 MB read and write speeds. It has Class 10 UHS-I performance. It is also compatible with different types of devices including tablet PCs, DSLR, android, smartphones, action cameras and more.
It is ideal for shooting photos and recording videos for your vacation and other outdoor activities. Thus, it is made with great quality, and it is shockproof, waterproof, magnet proof, x-ray proof, and temperature proof.
One negative thing about this memory card is that it can be easily broken.
Pros:
- It is x-ray proof, antimagnetic, shockproof, temperature proof and waterproof
- Useful for shooting photos and recording videos even on tough environments
- Great compatibility for different devices
Cons
- Some users complain that the card can be easily broken
10. Kingston Canvas React 128GB – Efficient Memory Card for Shooting Burst-Mode
Features:
- Fast speed of capturing 4K video and photos
- Excellent durability and reliability
- Designed for action and shooting burst mode
The Kingston Canvas React 128 GB is a Nikon d3400 memory card that is perfect for 4k video and burst-mode shooting. It has 100 MB reading speed and 80 MB writing speed. If you don’t want to miss the move of your subject, opting for this memory card is the best decision.
It is specially designed for action, so you can have smooth shooting and recording experience. It also comes with great durability making it an excellent partner for your outdoor activities.
The only negative thing about this card is that some customers complain that it can be easily broken.
Pros:
- It is a reliable memory card you can use for your photography and videography
- Class 10 UHS-I U3 speeds about 100 MB read, and 80 MB write
- Perfect for 4k video shooting and burst-mode photos
Cons
- Some user complain that it can be easily broken
Buying Guide for Best Nikon D3400 Memory Card
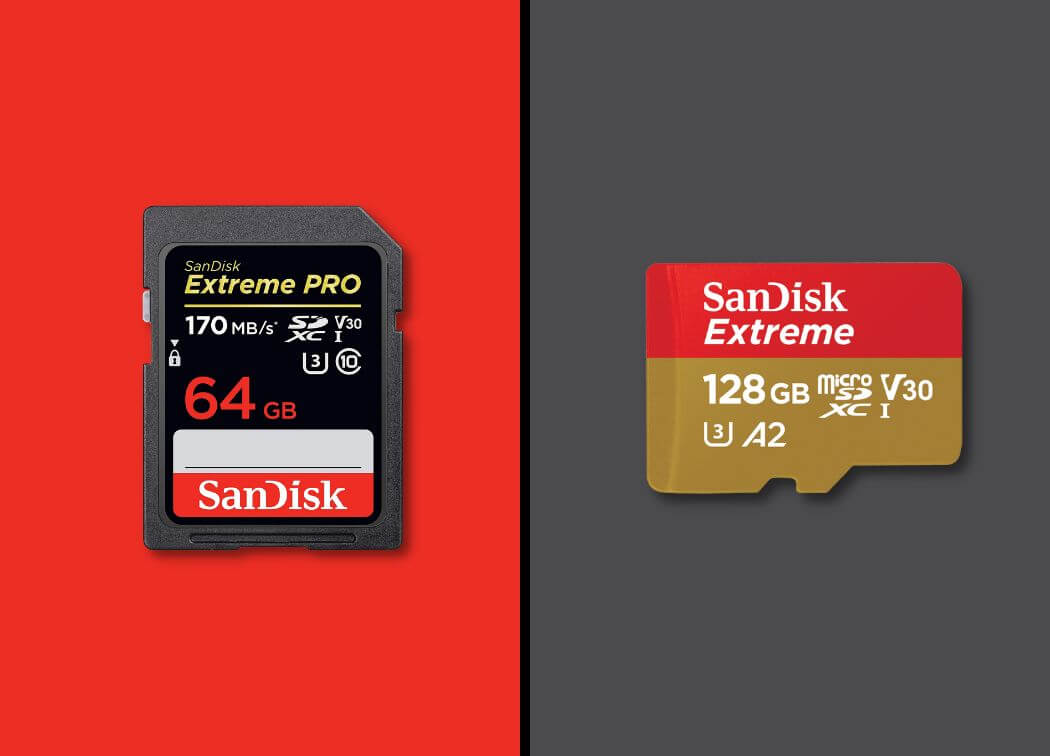
Finding the best memory card for Nikon d3400 is quite challenging. With lots of products in the market, you’re not sure which one is right for you. Are you currently looking for a memory card for your Nikon d3400? If yes, the following are some of the best factors that you must consider getting the best one. You may also like Sandisk Extreme vs Extreme Pro and the photo stick reviews.
- Speed Class Ratings
One of the factors you must consider in finding the best memory card for Nikon d3400 is its speed class ratings. There are different speed class ratings that will indicate the writing speed of the card. It includes Class 4, Class 6, Class 10, U1, and U3.
- Storage Capacity
The storage capacity is important when you are purchasing a memory card. You must choose according to the needs of your camera. Basically, the Nikon d3400 is compatible with cards with 64 GB, 32 GB, 256 GB, and 512 GB storage capacity.
- Write and Read Speed
The writing speed of the memory card is its ability to transfer the files from the camera to the card. On the other hand, the read speed is the card’s speed on transferring the files from the camera to another device. So, you must always prefer for a memory card that comes with fast writing and reading speed.
- Reliability Factor
Another factor in choosing the Nikon d3400 memory card is its reliability. Make sure that you can get the best performance of the card for your video recording and photography needs. You must prefer reliable brands including SanDisk, Sony, Lexar, Kingston, PNY, Transcend, and more. You can also check whether they are weatherproof to ensure that you can still use it even on tough shooting conditions.
- Pricing
If you are purchasing a memory card for Nikon d3400, you must also consider its price. Make sure that you get the best quality product that can match your budget. You must keep in mind that not all expensive models come with excellent quality, and not all affordable quality cards have poor quality. So, you must not depend on the price when it comes to quality. If you are conscious of budget, you must be careful in choosing the card that can enhance the best performance of your camera. Additionally, you can also have the assurance that the time, money, as well as the effort you invested for it, are all worth it.
Frequently Asked Questions
The factors mentioned above are necessary to help you purchase the best Nikon d3400 memory card. However, you must also have knowledge about the memory card to get one based on your individual needs. To achieve this goal, you can consider these questions:
Final Thoughts
Photography is already a big part of the daily lifestyle of millions of people in the world. So, if you want to make the best of your photography or videography, you must have the right equipment. Nikon d3400 is among the top cameras you can avail in the market to enjoy your photography passion. Meanwhile, you also need a quality memory card to enjoy the perfect efficiency of your Nikon d3400.
We hope that you already decided on choosing the best memory card for your Nikon d3400. With all the information we provided, we hope that you already picked your favorite one. What are you waiting for? Make sure to consider everything we mentioned in this guide. Happy picture taking and video recording!