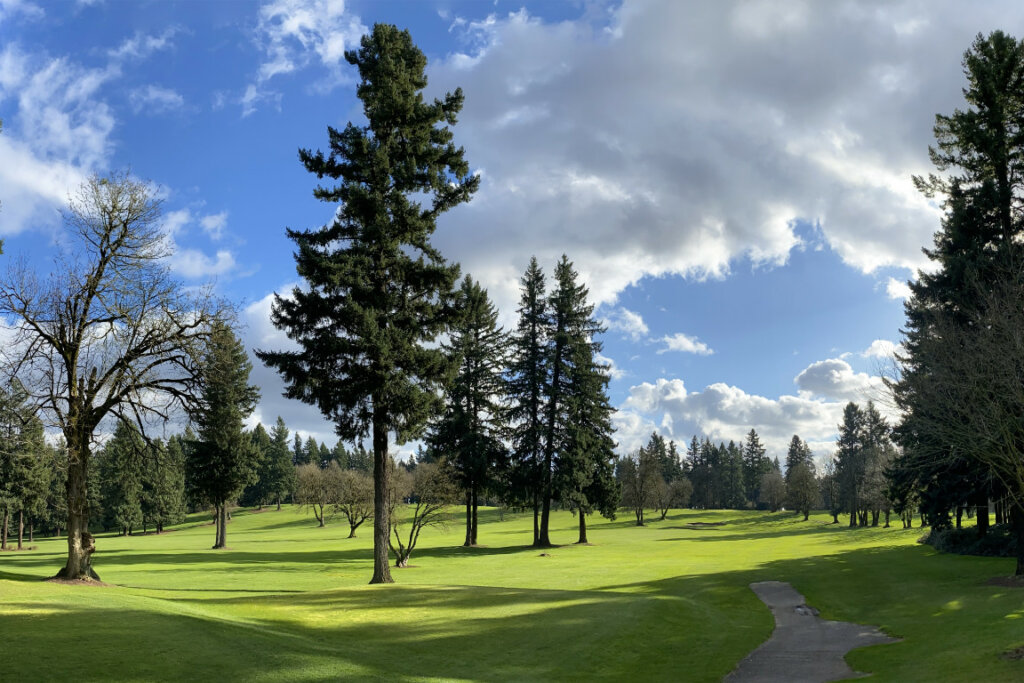
This post is about awesome landscape iPhone photography. It should be noted that all of the images in this post were taken by me using an iPhone 11. (except for the cover photo)
As the photos in this post show, it is possible to get very good quality landscape photos using an iPhone. In order to do it consistently at high quality requires paying attention to some settings and variables.
It also occasionally requires a small kit of external accessories. If you are looking to maximize the potential of the camera built into your phone read on.
How do you make iPhone pictures landscape?
1. Hold in landscape orientation
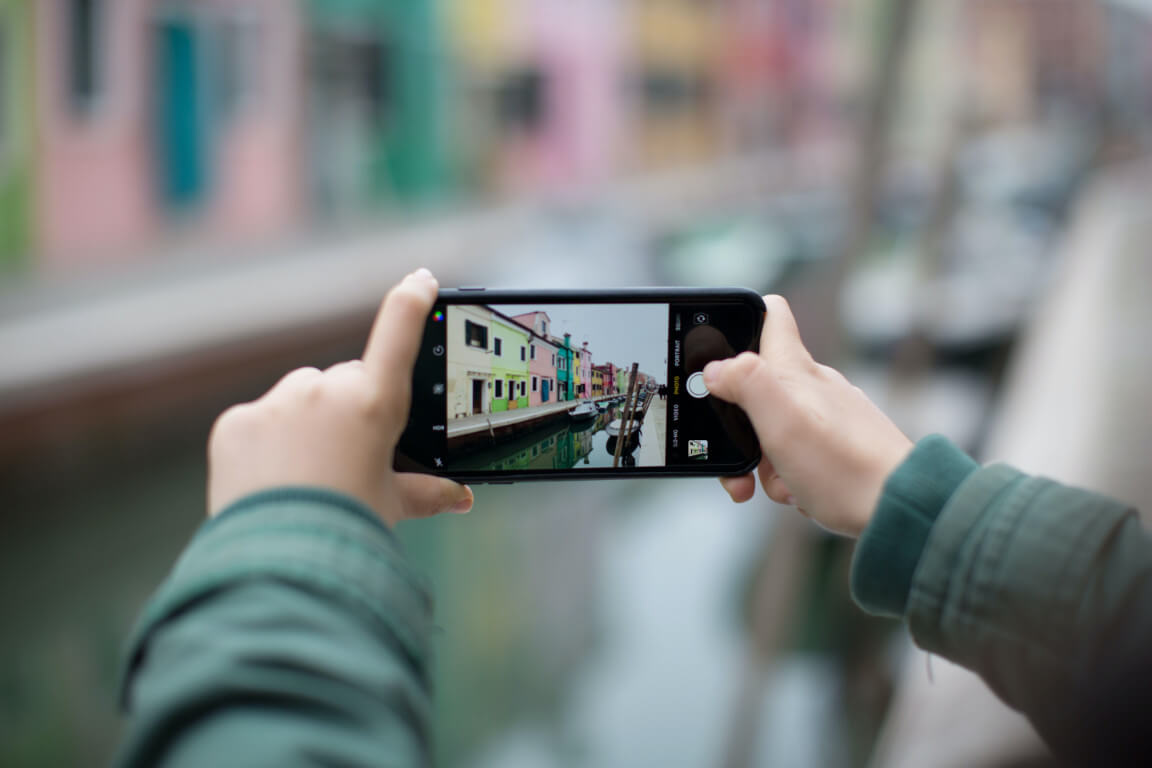
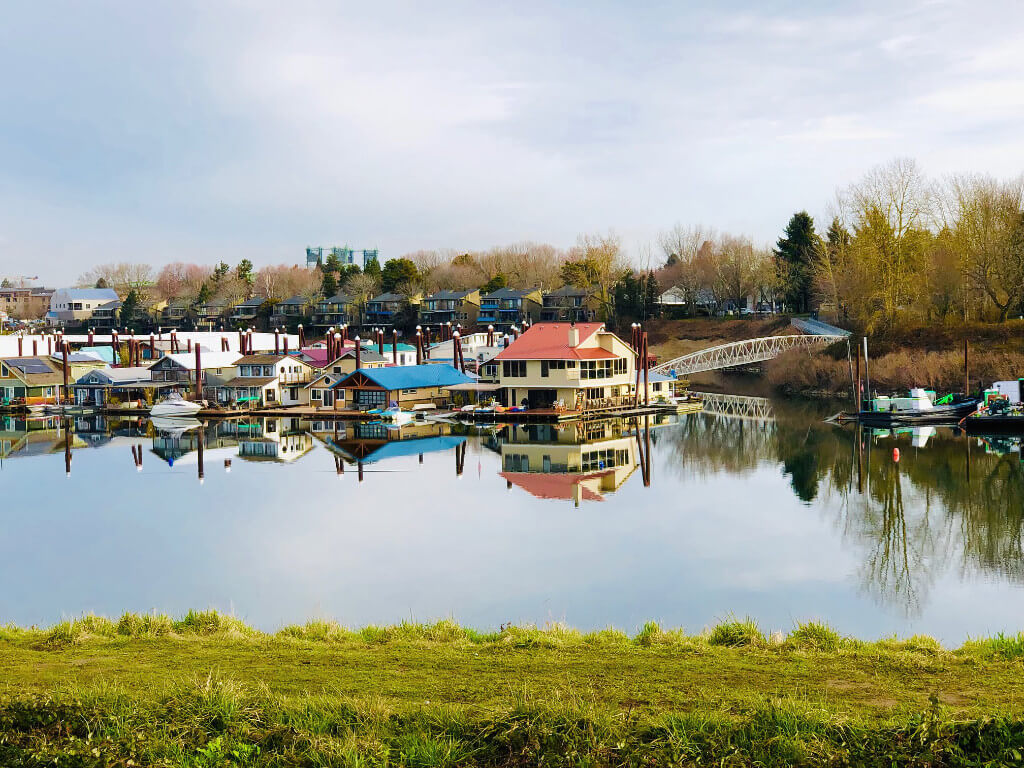
If you want to take great landscape photos, hold the phone in landscape orientation. That is sideways versus up and down. Landscape images are usually found in a 3:2 ration. 3 units wide by 2 units tall. This is roughly the same way human eyes work, given that we have two of them side by side.
The 3:2 format looks natural when displaying an outdoor or landscape image. Most DSLR camera capture images in 3:2 format. Shooting in this orientation is easier done using two hands, with one hand also engaging the shutter button. It can be done with one hand with some practice.
2. Enable 16:9 format
Like the 3:2 aspect ratio, 16:9 is another one of the wider than it is high image formats. Therefore, pleasing to the human eye. Shooting in 16:9 mode will give the images a slightly panoramic look which is great for landscape iPhone photography.
Turning on 16:9 format is done inside the camera app.
3. Turn on the grid for landscape iPhone photography
Photos with angled horizons, leaning trees and other inattention to detail can really make photos look amateurish. Unless you are doing special perception and perspective tricks on purpose, you really should ensure that horizons are in fact level.
Go into settings and scroll all the way down to the camera app settings, there is a switch in there to turn the grid on. Using the grid will help with both composition and keeping everything level and straight.
4. Enable HDR mode
You may have heard of HDR before. It gets a bad rap because of people abusing it and making photos look tacky and over color saturated. But when used judiciously it can help pull some detail out of high contrast settings. Getting more depth and contrast is a big improvement to landscape iPhone photography.
It works by taking photos at low, medium and high exposures and merging. This helps to bring up the shadows and cut down the highlights making the image a little more uniform. This option is in the camera app settings.
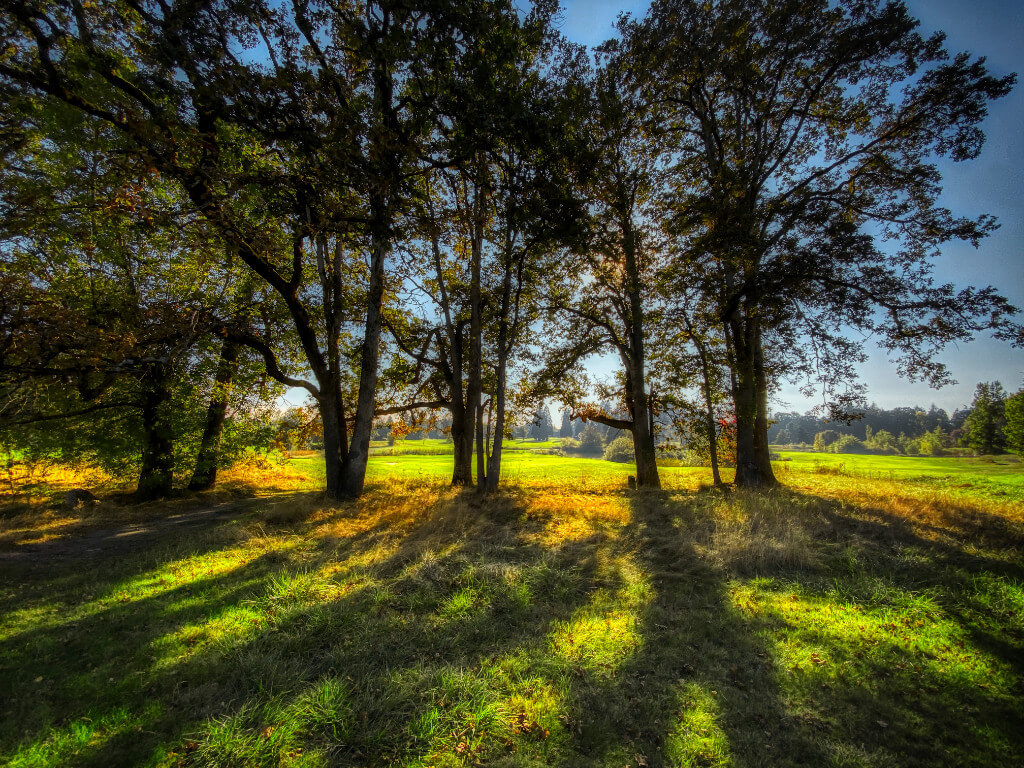
5. Use the golden hour for best light
The golden hour is a period between Sunrise and about and hour after sunrise. The lighting in this time frame leans to the yellow spectrum and gives everything a wonderful golden glow. There is also a golden hour just before sunset at the other end of the day.
A secondary benefit to this time frame is that there is very little of the glare haze you see during mid-day sun. This time of day also benefits greatly from the use of HDR mode where the contrast and colors are enhanced.
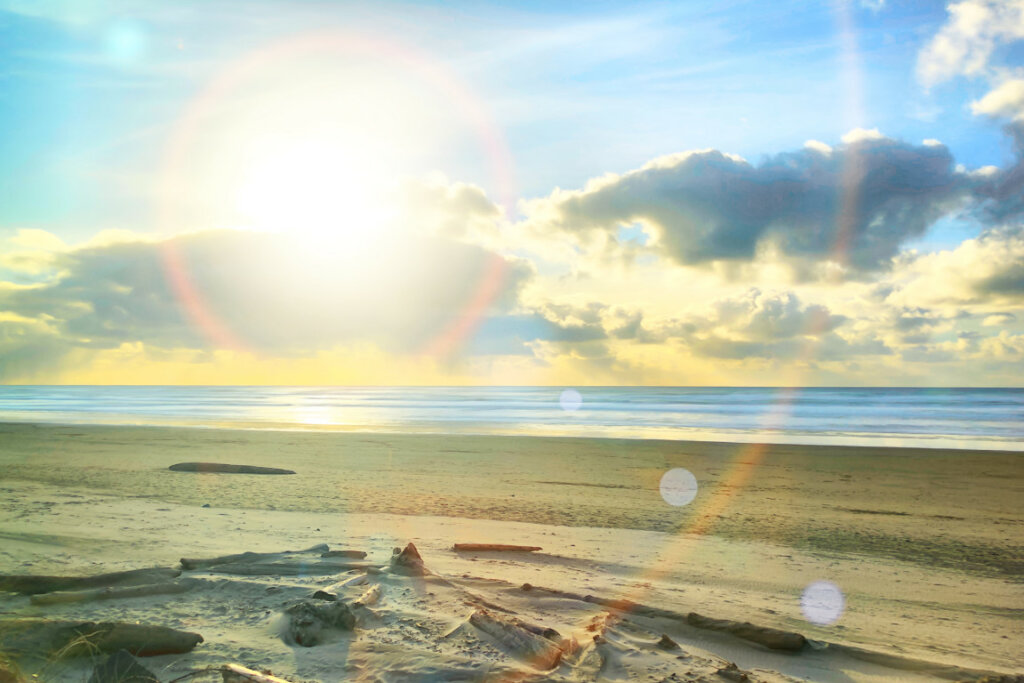
6. Location of the sun
When shooting photos, it’s always wise to pay attention to the location of the sun. Typically, you want the sun to your back, or at least over one shoulder. This ensures the light is striking the subject and illuminating it properly.
That is unless you are going for the light effect like the photo below. Another reason you might want the sun in front of you, is if you are going for a silhouette. Back lit silhouettes can be very powerful landscape iPhone photography.
7. Lock the focus
There are times when you want the foreground to be in focus but still want a lot of the background in the photo. The best way to achieve this is by tilting the phone toward the foreground and locking the focus.
Then tilt the phone back up to capture the background as well. This will likely cause the background to be slightly blurred while the foreground is nice and sharp.
You lock the focus by pressing and holding the screen over the image. A message appears saying AF/AE Lock at the top of the screen. Now recompose the shot and snap the photo.
8. Use the exposure slider
Sometimes when you are framing a scene, part of the image will be either too light or too dark. In order to resolve that you can adjust the exposure to correct that.
One way to adjust exposure is to tap the screen near the area that needs adjusting. Now slide your finger up and down on the sun icon next to the yellow box. Sliding up will make the photo lighter, sliding down will make it darker.
A more precise adjustment is in the camera app adjustments. Tap the up arrow above the photo screen. The adjustment is on the bar below the screen to the right of the 16:9 / 4:3 selector.
9. Use a tripod to reduce blur
I have a super small lightweight tripod that I use for smartphone photography (and video). This is really helpful in several cases. One is when taking photos closer to dark where shutter speeds start to slow down to let in more light. This is when it’s easy to cause blur due to movement.
A tripod is also helpful when you are trying to compose the scene and get zoom, focus and exposure all set up. That’s troublesome when hand holding the phone and trying to maintain the composition.
Also, a mini-pod with flexible legs can be very useful! You can put your phone on a large rock, wrapped around a tree limb, or even just the hood of a car.
When you have the camera mounted in a tripod, touching it to push the shutter button kind of defeats the purpose.
Using a Bluetooth remote shutter button means you don’t need to touch the phone to snap the photo. This will further prevent shaking and blur. It will also be helpful if you want to get in front of the camera for some selfie shots.
11. Get an external lens
If you are really serious about doing landscape iPhone photography, then consider getting a wide-angle external lens.
This will allow you to get more of the scene in the photo without making the image any wider. Those wide-open vistas really make for impactful landscapes.
Final Thoughts
Using the information provided here and with some practice you can be shooting awesome landscape iPhone photography regularly. Once these are put into practice, they become second nature and are easy to implement. Have fun!